This page may contain affiliate links; you can read our full disclosure.
Sharpening a serrated knife is often treated as some kind of mystery, but the reality is simpler than most people think. Serrated edges don’t require special skills, expensive equipment, or professional services — they just require the right type of sharpener and an understanding of how serrations actually work.
The biggest mistake people make is treating a serrated knife like a straight-edge blade. Serrations cut differently, they wear differently, and they must be sharpened differently. Once that difference is understood, sharpening a serrated knife becomes a slow, controlled process that preserves the edge instead of destroying it.
Why Serrated Knives Sharpen Differently
A straight-edge knife cuts with one continuous edge. When it dulls, the entire edge loses sharpness at roughly the same rate. Sharpening restores that edge by refining a single bevel along the blade.
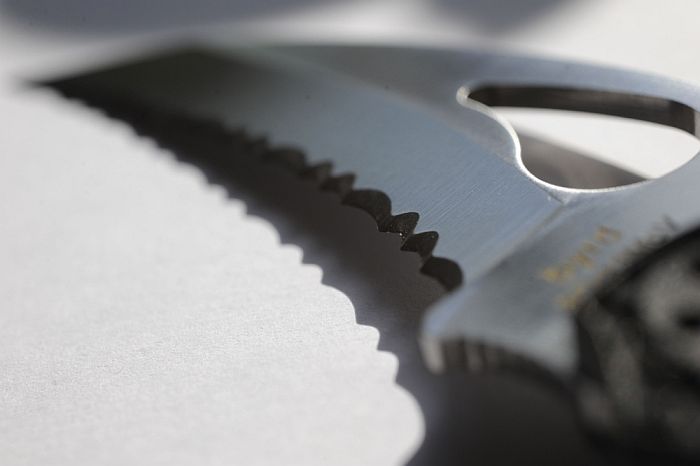
A serrated knife works in segments.
Each serration is its own small cutting edge, and the curved gullets between the teeth do most of the cutting. This design allows serrated knives to bite into rope, webbing, cardboard, bread crust, and fibrous materials with far less slipping than a plain edge.
Because of this:
- Serrations dull unevenly
- The inner curves lose bite first
- The tooth tips may still look sharp even when performance is poor
This is why flat stones and belt grinders are such a bad idea. They never reach into the gullets. Instead, they grind down the tooth tips, flattening the serrations and permanently degrading the knife.
Sharpening a serrated blade is about restoring the inner curves, not reshaping the entire edge.
Understanding Serration Geometry Before You Start
Most serrated knives are ground on one side only. This is called a single-bevel serration. The beveled side contains the cutting geometry. The opposite side is nearly flat and exists only to support the edge.
Before sharpening:
- Identify the beveled side (the side with visible grind angles)
- Sharpen only that side
- Lightly deburr the flat side at the end
If you sharpen both sides aggressively, you will flatten the teeth and shorten the blade’s life dramatically.
Tools For The Job
A serrated knife can be sharpened correctly using a single serration-compatible sharpener. There is no requirement to buy multiple tools.
The examples below are three different types of sharpeners, each representing a valid one-tool solution.
Which one you choose depends on how you sharpen, where you sharpen, and how much control you want.
Option 1: Spyderco Sharpmaker Tri-Angle Kit
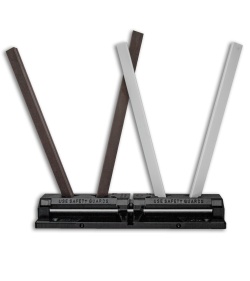
The Spyderco Sharpmaker is one of the most forgiving and repeatable ways to sharpen serrated knives, especially for users sharpening at home.
Why It Works for Serrations
The triangular ceramic rods have corners that naturally fit into many serration patterns. When the knife is held vertically, the rod sharpens the curved gullet evenly without requiring you to freehand angles.
How to Use It on a Serrated Knife
- Set up the Sharpmaker with the rods in the standard configuration
- Hold the knife vertically with the beveled side facing the rod
- Place the serration onto the corner of the rod
- Draw the knife downward slowly, allowing the rod to contact each serration
- Use light pressure — ceramic works best patiently
- Make several passes until you feel a light burr form
After sharpening the beveled side, flip the knife and make one very light pass on the flat side to remove burrs.
Best For
- Home sharpening
- Multiple knives
- Users who want consistency and minimal steel removal
Limitations
- Slower on severely neglected edges
- Not portable
Option 2: Lansky Spyder Serration Sharpener
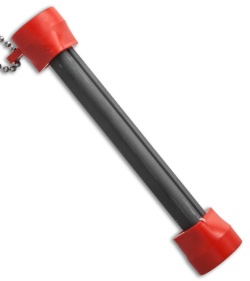
This tapered rod style sharpener is one of the most common and effective serrated tools available.
Why It Works
The taper allows the rod to fit different serration sizes. You sharpen one serration at a time, following its curve precisely.
How to Use It
- Identify the beveled side of the blade
- Insert the rod into the first serration
- Match the existing angle — don’t force a new one
- Make short, controlled strokes following the curve
- Use 2–5 light passes per serration
- Move to the next tooth and repeat
Once finished, lightly deburr the flat side with a single gentle pass.
Best For
- Occasional sharpening
- Field kits
- Users who prefer direct control
Limitations
- Slower than systems
- Requires attention to angle
Option 3: DMT Diafold Serrated Sharpener (Fine)
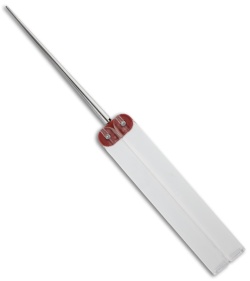
Diamond sharpeners remove metal faster than ceramic, making them useful for heavily dulled serrations.
Why It Works
The fine diamond surface restores bite quickly while still fitting inside serrations when used carefully.
How to Use It
- Work only on the beveled side
- Use extremely light pressure
- Follow the curve of each serration
- Make very few passes — diamond cuts fast
- Stop as soon as sharpness returns
Finish with a light deburr on the flat side.
Best For
- Very dull knives
- Heavy rope or webbing use
- Users comfortable with light pressure control
Limitations
- Removes steel quickly
- Less forgiving if rushed
How Often Serrated Knives Need Sharpening
Serrated knives stay functional longer than plain edges because only parts of the blade contact material. Most serrated knives used outdoors or for EDC only need sharpening once or twice a year.
Sharpen when:
- The knife slips instead of biting
- Rope frays instead of cutting cleanly
- Extra force is needed to start a cut
Over-sharpening causes more damage than waiting.
Common Mistakes to Avoid
Most ruined serrated knives are damaged by sharpening mistakes, not use.
- Flat stones across the edge
- Power grinders or belt sanders
- Sharpening the flat side aggressively
- Using coarse grit rods indiscriminately
- Rushing through serrations
Patience preserves the blade.
When Serrations Can No Longer Be Restored
Sharpening can only refine existing metal. If serrations become shallow and rounded after years of heavy use, performance will eventually decline permanently.
Some manufacturers offer re-serration services, but for many knives replacement becomes the practical option at that stage.
Final Thoughts
Sharpening a serrated knife is not difficult — it’s specific. Serrations are a series of small cutting edges, and each one deserves individual attention.
Choose one serration-compatible tool, work only on the beveled side, remove as little metal as possible, and take your time. Done correctly, a serrated knife will maintain its bite far longer than most people expect.
That understanding — not the number of tools — is what keeps serrated knives cutting at their best.
